
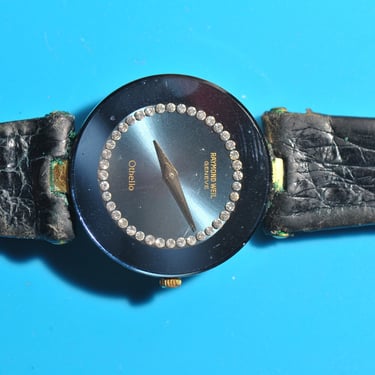
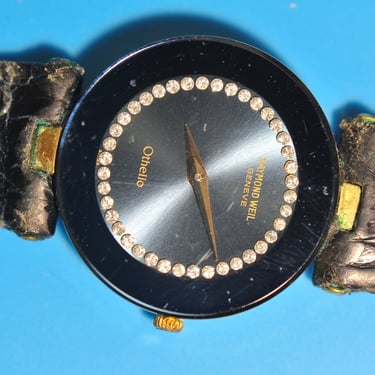
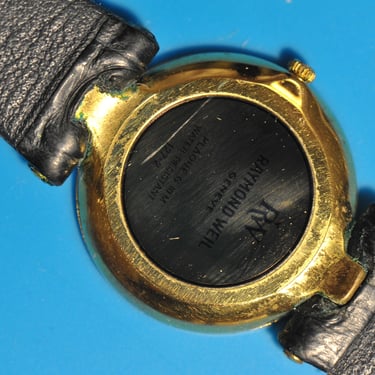
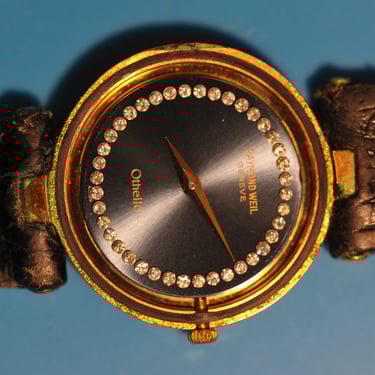
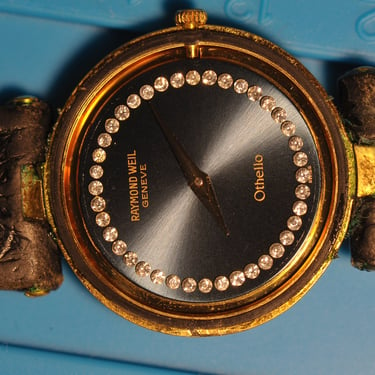
Raymond Weil Othello
Beautiful little NIGHTMARE!
A guide for those willing to service a similar watch.
Disclaimer...
I am not a watchmaker.
I am not a watchmaker.
I am not a watchmaker.
I’m just a hobbyist who has read a few books, watched a bunch of videos, taken apart a couple of watches, and works with a very limited budget for tools and supplies. I’m not saying that what I do is the right way—I’m simply sharing what I did, how I did it, and what results I got. Maybe this can serve as a guide, but honestly, I write these articles mostly for entertainment.
Now, a quick word of caution: this Raymond Weil has some tiny, springy parts that could fly across the room—or worse, into your eyes. Please know what you’re doing and don’t get hurt.
Radiation isn’t a concern with this particular model, but some watches do contain Radium, Tritium, or other radioactive elements. Radium, in particular, is extremely toxic. The body mistakes it for calcium and stores it in the bones, which led to the heartbreaking tragedy of the Radium Girls. If you haven’t heard about them, look it up—it’s sobering.
So before you crack open a watch, make sure you know exactly what you’re dealing with. Take proper safety measures, and when in doubt, use a Geiger counter to check how “hot” a watch might be.
Be safe—and enjoy the read!
Meeting the Raymond Weil Othello
The other day, I was talking with someone very dear to me about how I’d recently restarted an old hobby—watchmaking. We began chatting about different watches, and she started showing me a few old pieces she had picked up at various goodwill stores.
I, in turn, showed her my own collection—“five-buck” flea market finds that I had fully serviced and brought back to life. I even mentioned a broken Tissot I’d managed to repair, which had needed a new electronic module and a complete service.
Then, all of a sudden, her eyes lit up. She began talking excitedly about a Raymond Weil she had bought around 40 years ago—back when Rado launched their ceramic line in the mid 1980s—and insisted she had to show me. Back then, she had spent around 600 bucks (in 1980s money) on this watch, which was quite a stretch for her. The Rado was even more expensive, so the Raymond Weil became her prized choice. What followed was an hour-long treasure hunt through her home. Along the way, she found another watch—a gift from an ex-boyfriend—but still no sign of the Raymond Weil.
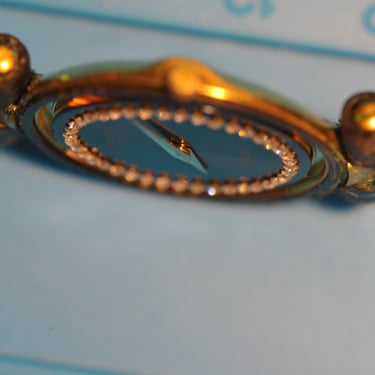
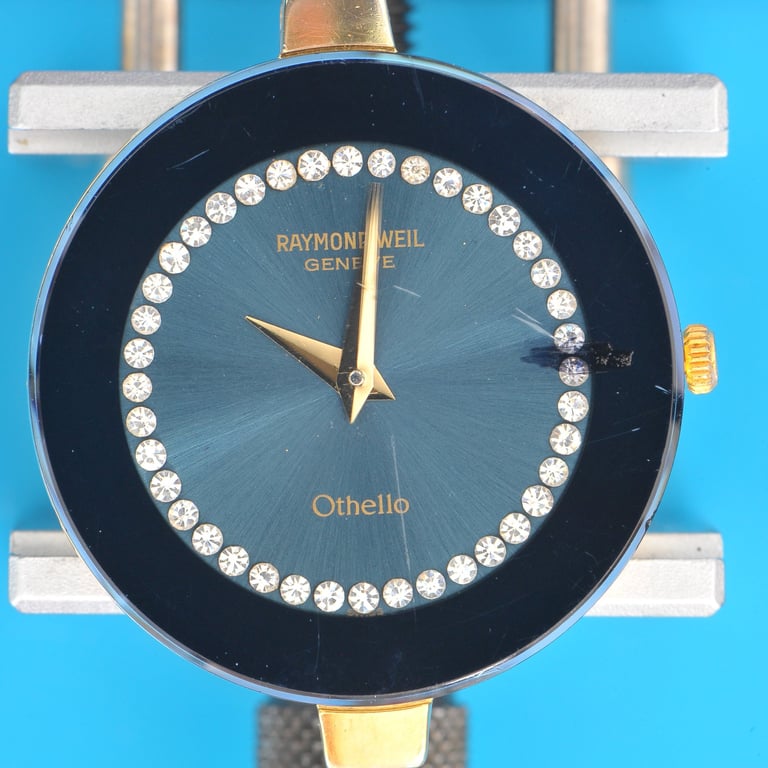
Eventually, though, she emerged from a corner of her house holding it in her hand: a thin, beautifully crafted watch.
To be honest, I had never seen such fine horological craftsmanship up close. It was simply stunning. Unfortunately, it had been sitting in a less-than-ideal place for over three decades—still with the old factory battery inside.
She asked if I could take a look and see if it was salvageable. Normally, I’d pass on mechanical wristwatches; I don’t feel confident enough yet to deal with the complexity of their many springs. But quartz? That I could try.
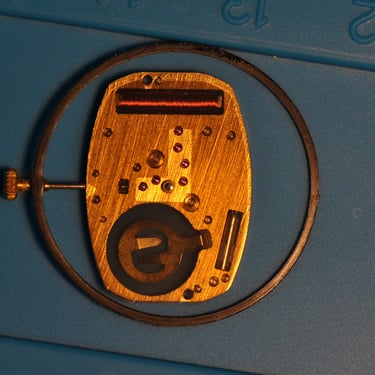
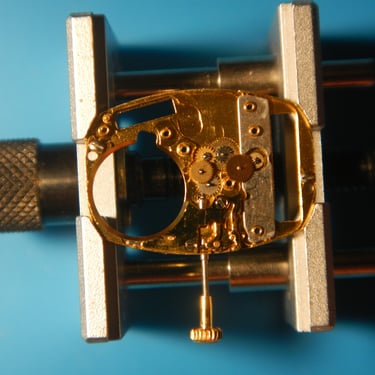
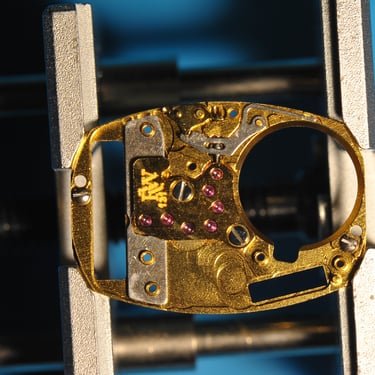
I told her I’d see what I could do. Immediately, I started searching for information on this particular model—and found almost nothing. Just one video on how to open it, and an eBay listing for a similar watch, which I promptly added to my favorites in case I needed spare parts. As you can see from the pictures in the gallery above, the little Othello already showed plenty of green corrosion, as if battery acid had taken its toll, so changes were it would need a doner...
Still, armed with a single video and no other guidance, I felt confident enough to proceed. I would take the watch apart, photograph every step, figure out what it needed, put it back together, and—hopefully—make someone very happy.

Raimund... Who?
I am not a luxury guy. Heck, I think luxury shouldn’t even exist as long as there are wars, hunger, poverty, homelessness, no access to water, no education, no universal healthcare, etc. I would trade off every luxury item to solve those things.
I’m not saying that owning an Omega or a Rolex or a fancy car is the kind of luxury I’d call “unnecessary.” I’m talking about yacht-and-private-jet-level luxury. Not about working hard and then buying something nice. I mean the kind of life where someone can buy a tenth Rolex in a week and still wonder what to do next.
People like that only exist because others are being exploited—working their asses off for cents on the dollar. Anyway, I guess that makes me a full-blown terrorist now!
About the brand:
That being said, until recently, I didn’t know much about Raymond Weil. There are so many watch brands out there that it’s easy to get lost in the sea of logos. Personally, I’ve always valued quality and longevity over a flashy name on a dial. But for context, here’s a quick rundown of the brand—just enough to know what I was holding in my hands:
Raymond Weil is a Swiss watchmaker founded in 1976, right in the middle of the Quartz Crisis—a time when traditional watchmaking was suddenly under serious pressure from quartz movements. Somehow, they survived, and even managed to carve out a little niche for themselves. The brand has always mixed solid Swiss craftsmanship with a love for music. Many collections are named after famous composers or works, like Amadeus, Fidelio, Traviata, and Maestro. It’s family-owned, focused on tradition, and somehow manages to be stylish without feeling over-the-top (let me thank the AI for this bit of information).
About the Othello collection:
The Othello line came out in 1986 to celebrate Raymond Weil’s tenth anniversary. And wow—this is where things get interesting. The cases were ultra-thin, like they’d been shaved down with a razor blade, but without losing any of the elegance. Sleek, refined, a little daring for the time. It blended technical precision with artistry, the kind of watch that makes you pause and actually look at it. (let me thank the AI for this bit of information too).
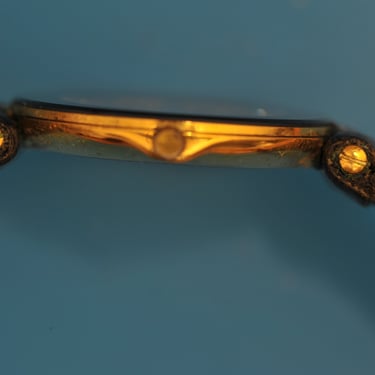
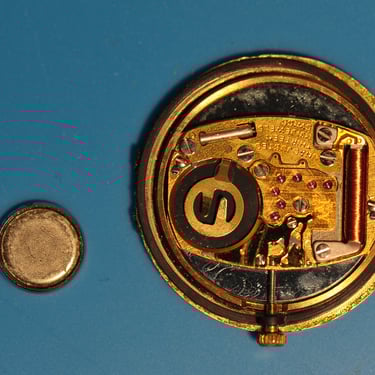
Honestly, I had no clue about Raymond Weil or the Othello collection until I started digging. But this little watch shows that Raymond Weil wasn’t just following trends—they were quietly making their own, like the caliber that is inside this watch. Its a proprietary design, and impressively thin, almost out of this world. And holding one up close? You can feel that mix of craftsmanship and creativity.
Working? No Working....
One thing I usually like to do when taking a watch apart is start simple: replace the battery and see what happens.
If nothing happens—not even a tiny twitch—I know there’s likely an issue with the watch’s electronics. But if it ticks, even a little, I can assume that after a proper service, it should tick again—unless I mess something up along the way (which, of course, adds a bit of pressure).
With this watch, things were… interesting. It was kind of ticking, but very irregularly. I put in a new battery—well, not the exact right type, but at least the correct voltage—and saw that the motor twitched from time to time. Sometimes, though, I had to stare at it for a full minute before seeing any movement at all. The hands, however, didn’t move one bit. That left me wondering: seized movement? Bad electronics? Maybe both? But at least there was a little life inside—just enough to give me hope. Hope that this little Othello might run again.
Disassembly
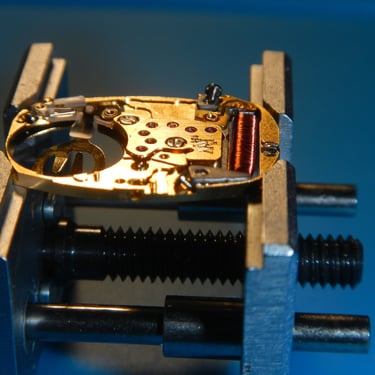
I really enjoy taking watches apart. At this stage, I don’t have to worry too much about cleanliness since I’ll be cleaning all the parts later anyway. The only thing I need to focus on is taking as many pictures as possible—because trust me, they’ll save me later when it’s time to put everything back together.
It’s the kind of work that just flows.
By the way, if you want to see a video on how to open this watch. Watch this guy, it will give you an idea. I recommend to watch from Minute 1:15 onwards.
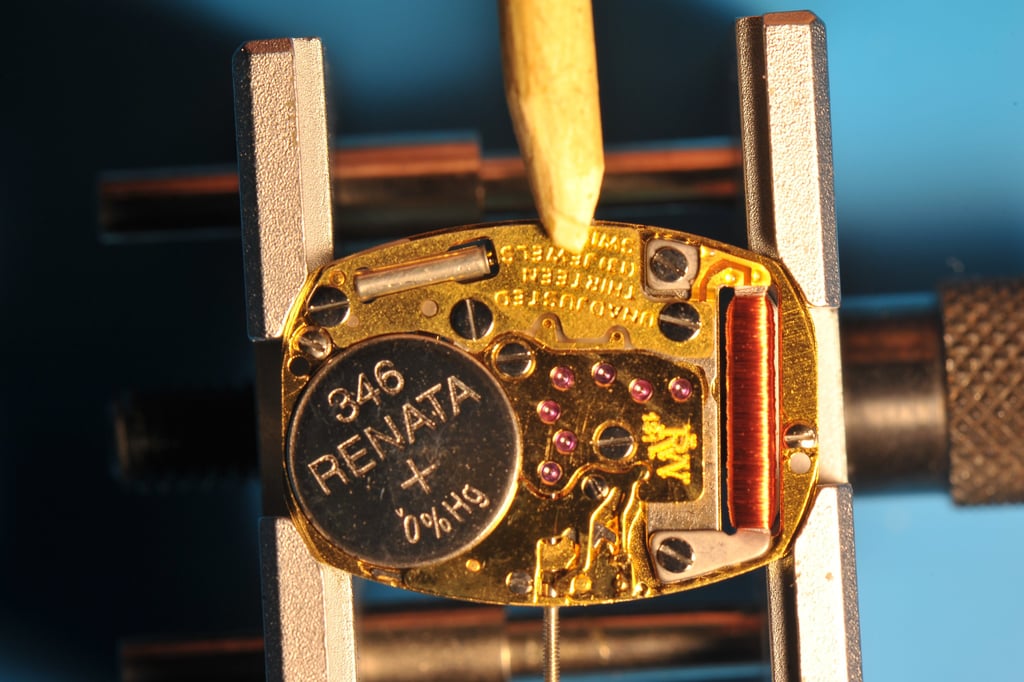
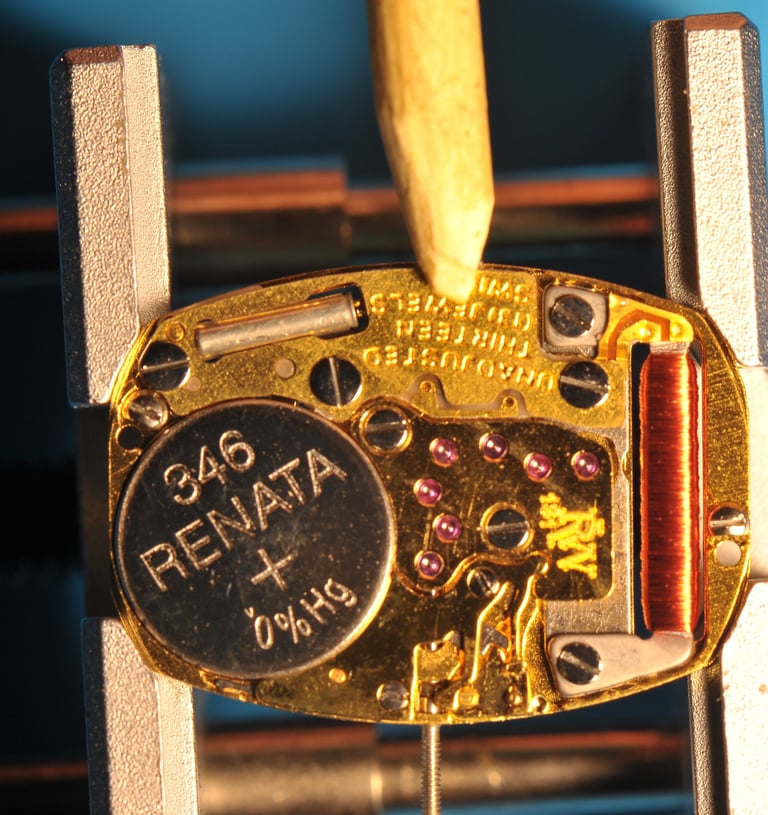
During my first inspection of the watch, I noticed that the battery had leaked. But to my surprise—and relief—the extent of the damage was far less than I had expected.
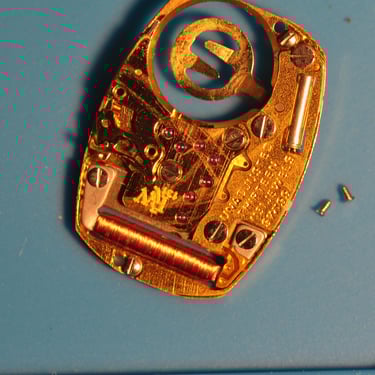
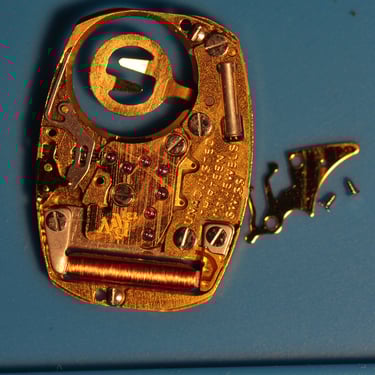
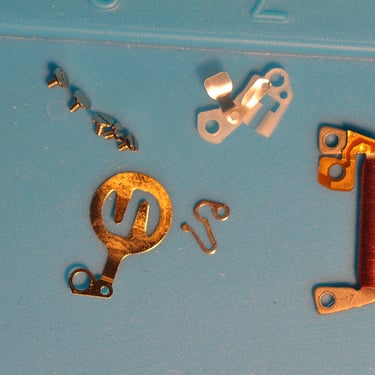
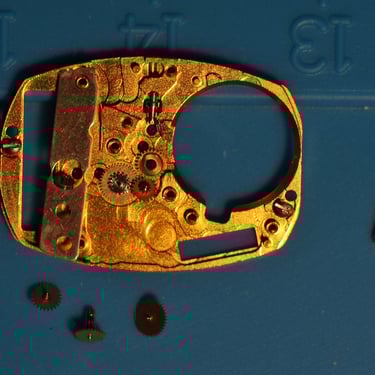
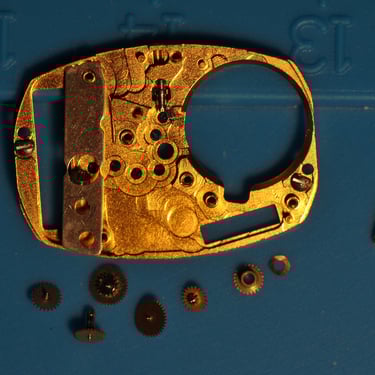
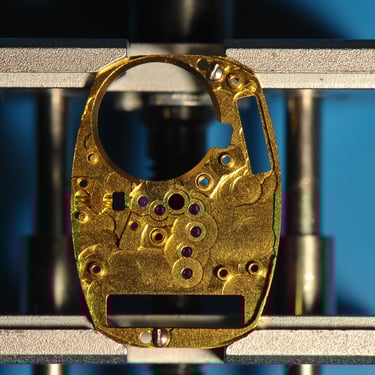
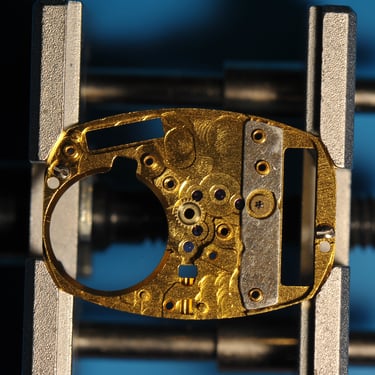
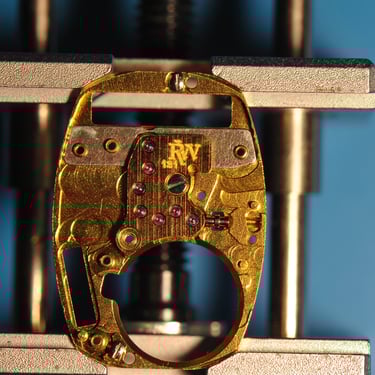
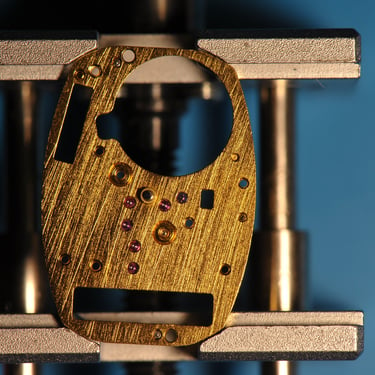
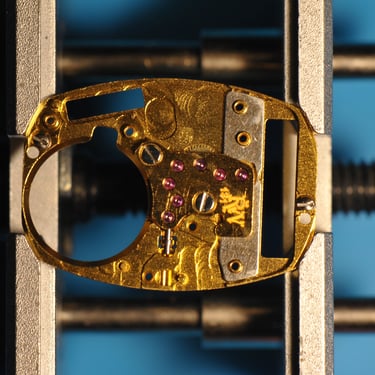
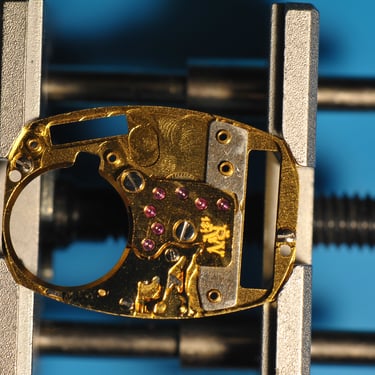
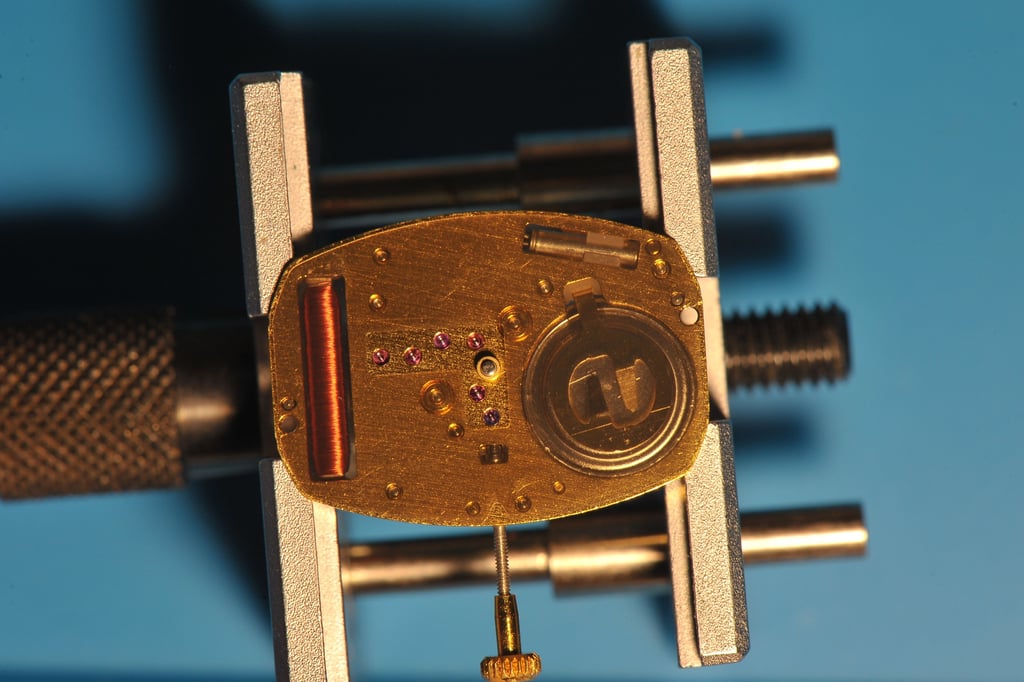
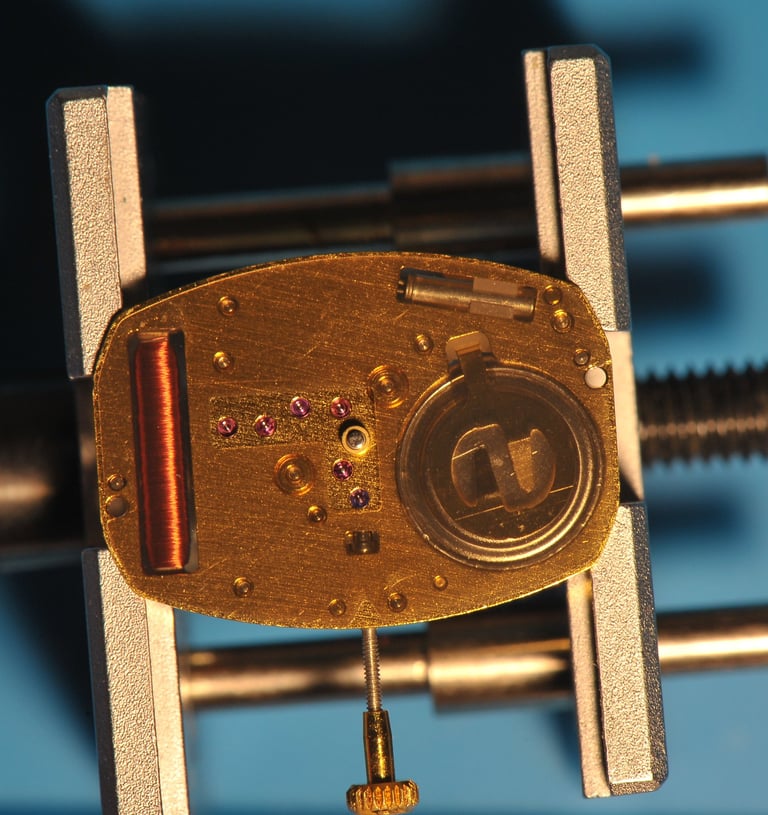
The gallery below shows the parts in the order I took them apart. If I don’t highlight or comment on something, it simply means there’s nothing tricky going on—just basic watchmaking common sense (watch out for those springy parts that love to fly).
Whenever there’s something worth noting, I’ll pick a picture and point it out clearly(or make a comment in the picture)—so you know exactly what to look for.
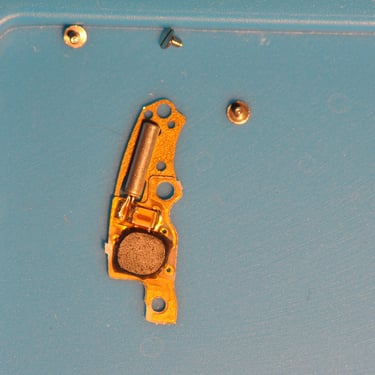
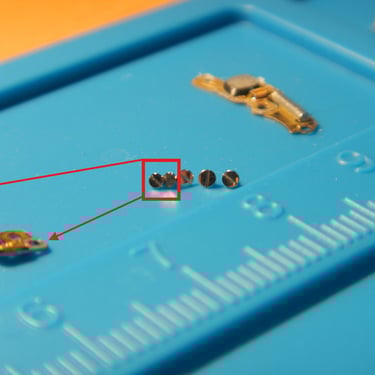
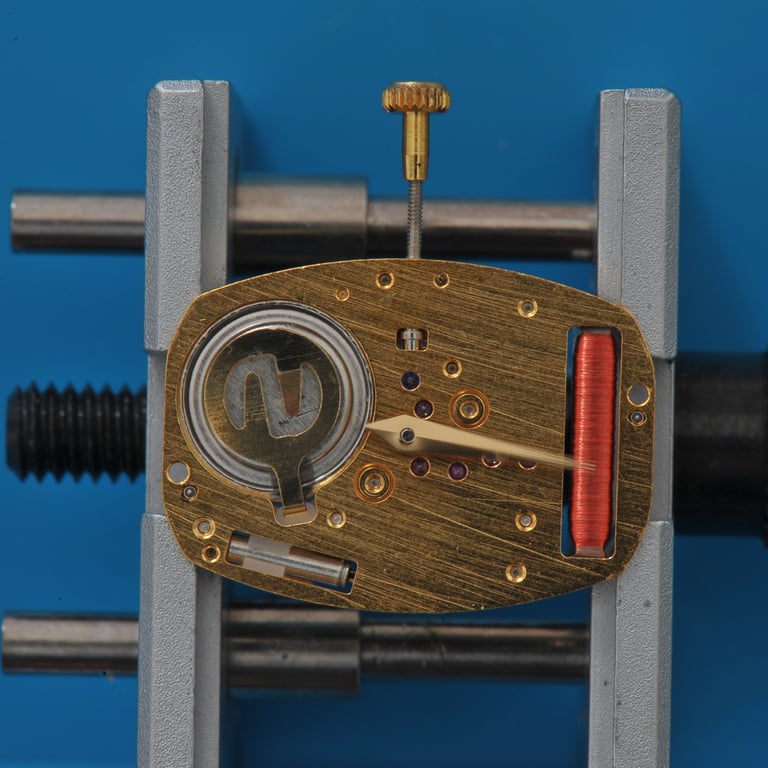
Note the different screws for the coil—they have a smaller head diameter. Also, pay attention to where the battery contact insulator goes (that thin transparent little piece of plastic).
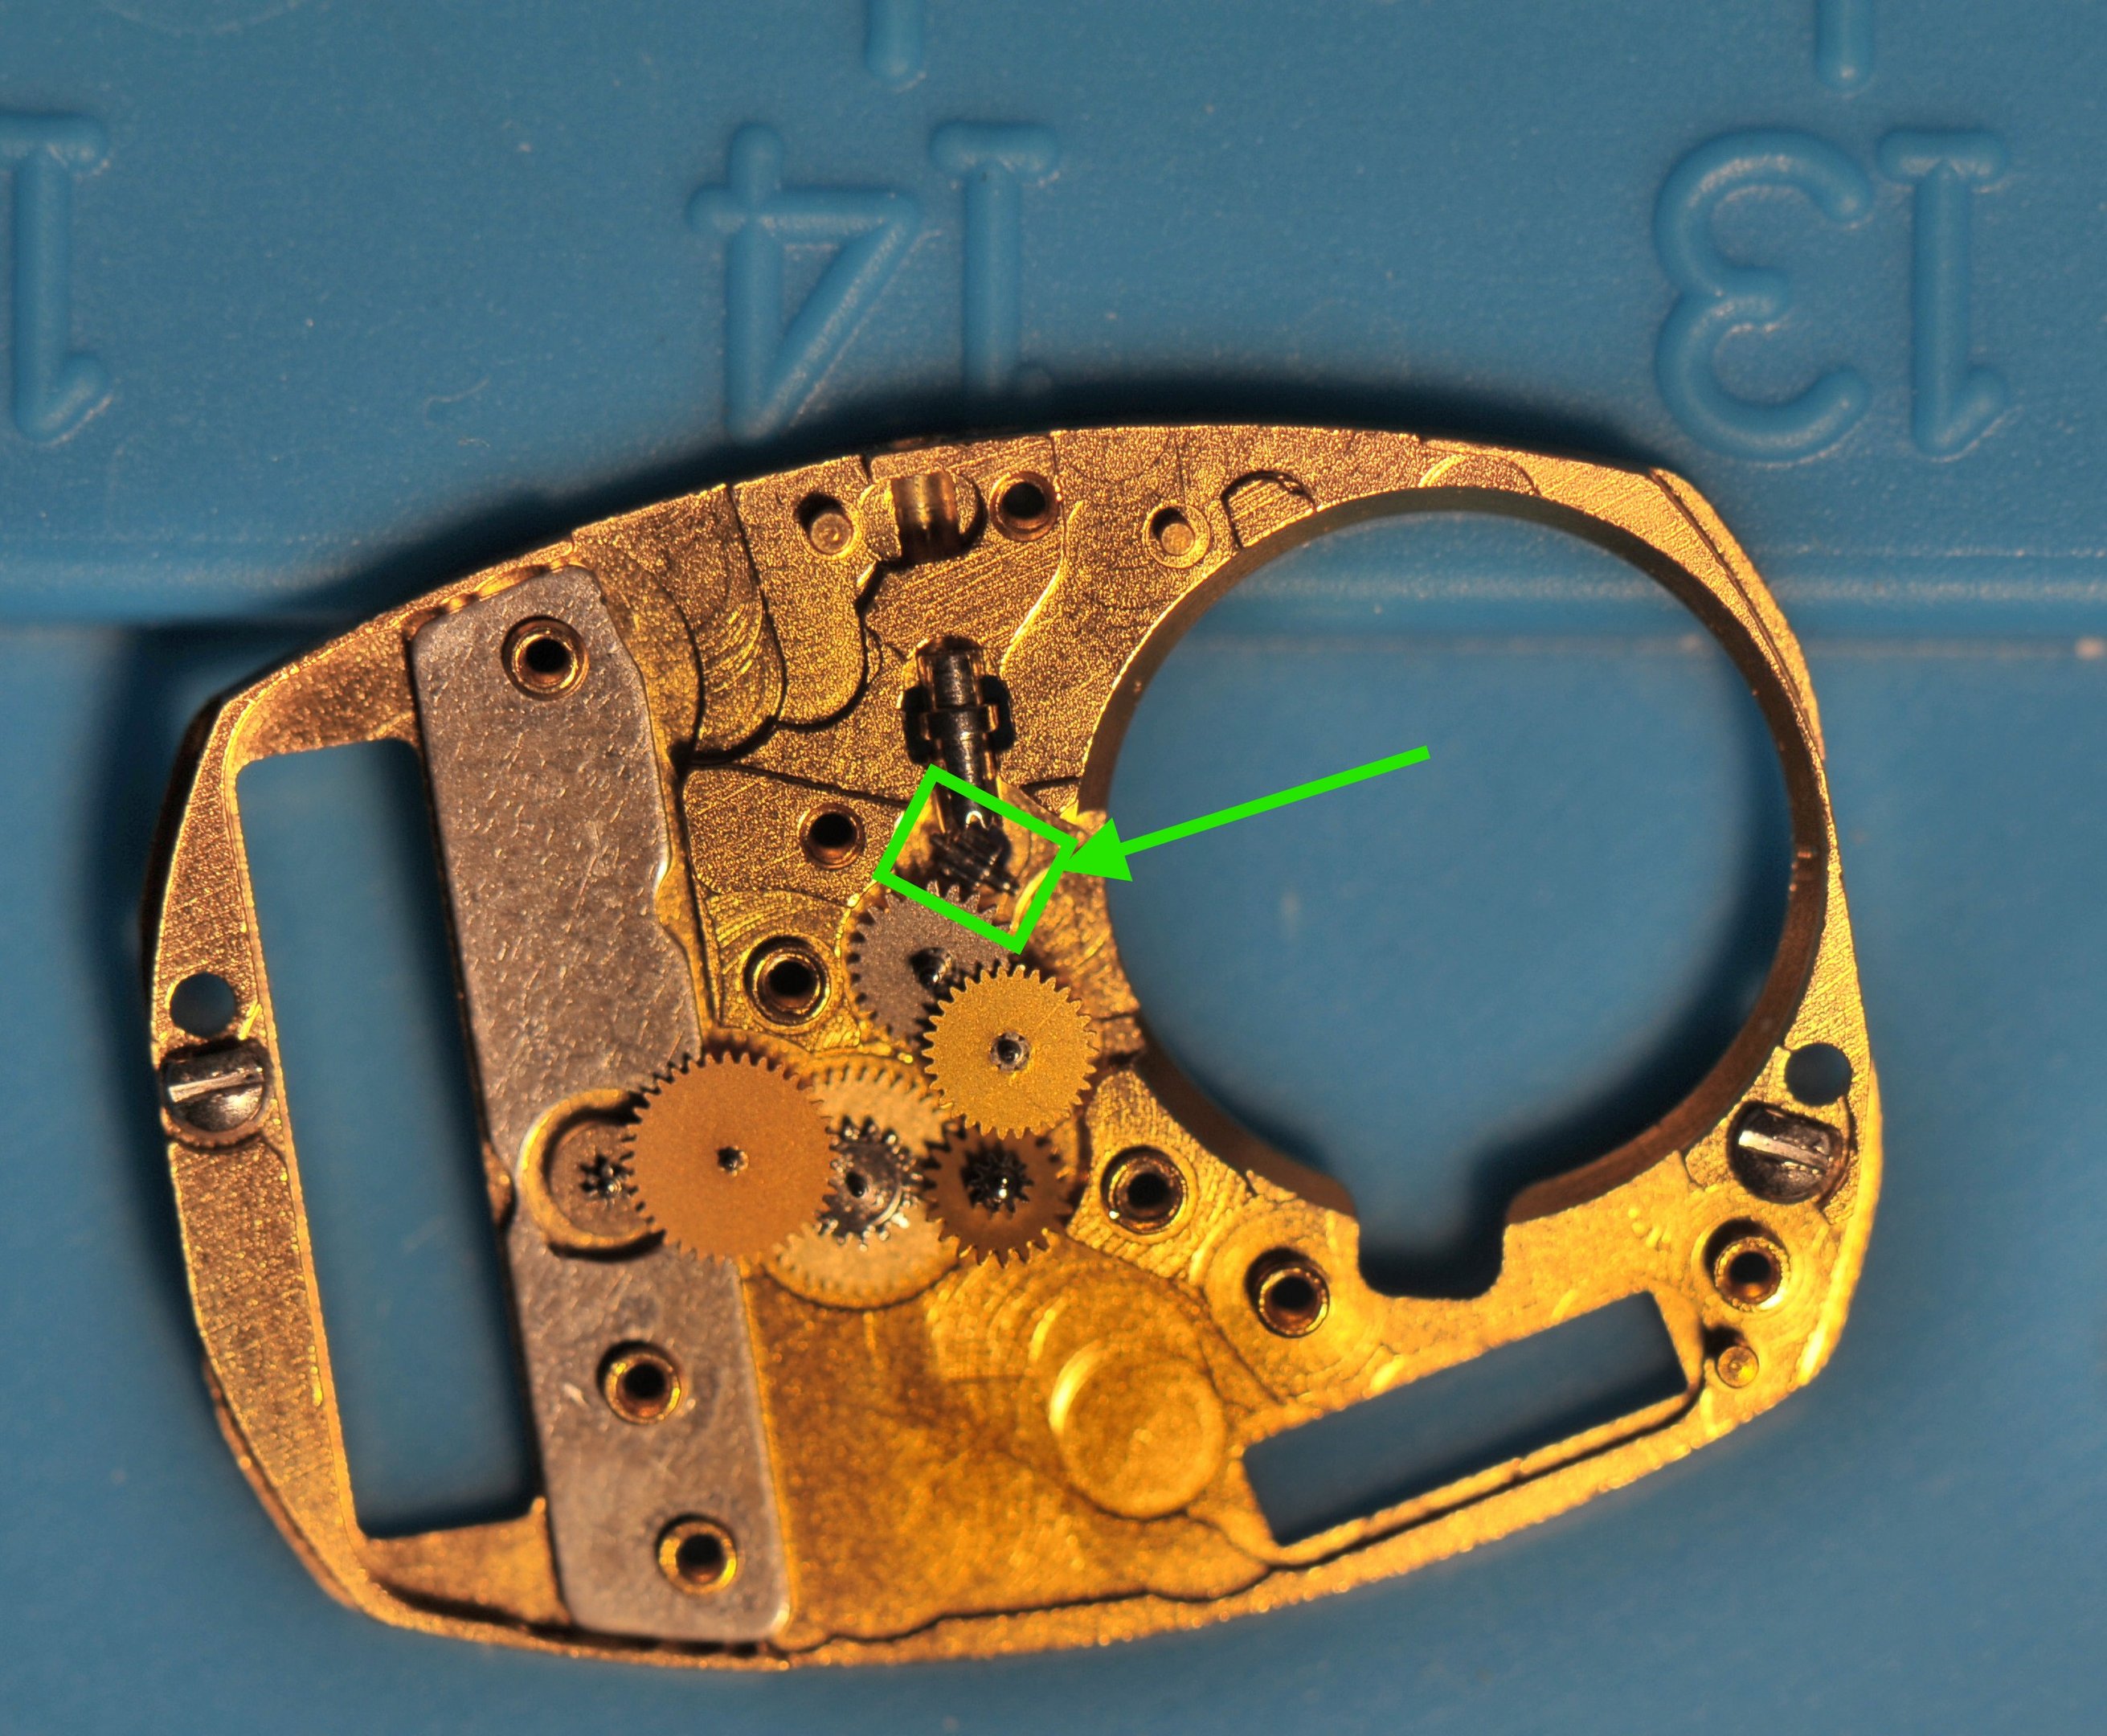
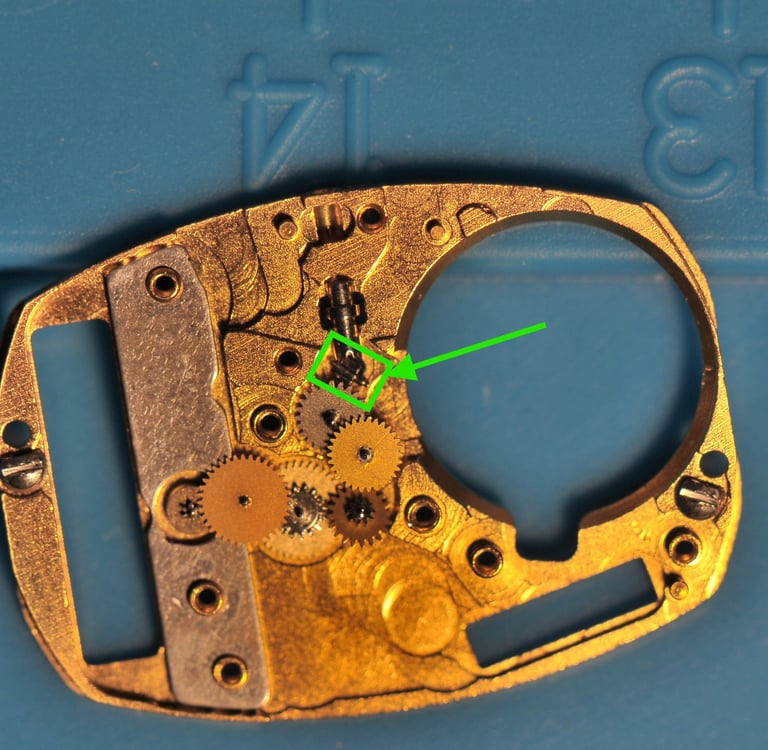
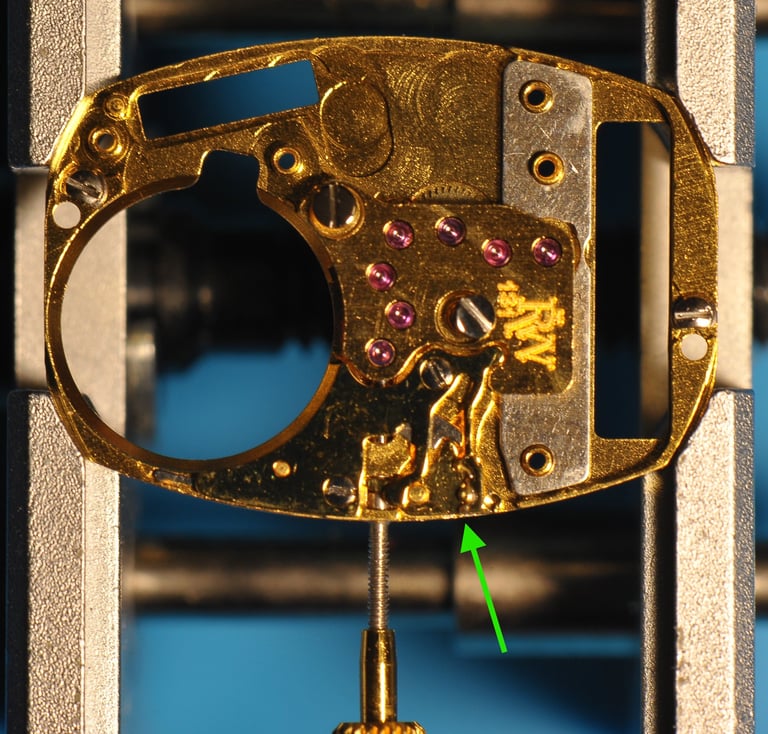
When I took the gear train top plate apart, the smallest gear of all was lying on its side. It had probably been stuck with old oil on its pivot/jewel and got dislodged when I carefully removed the plate. If this happens to you, keep reading. Later in the assembly section I’ll show how to put it back together the right way (Yes it took me two attempts to "learn" what is the right way).

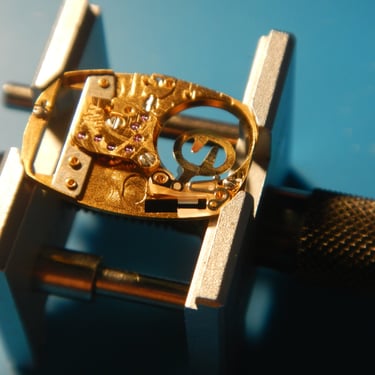

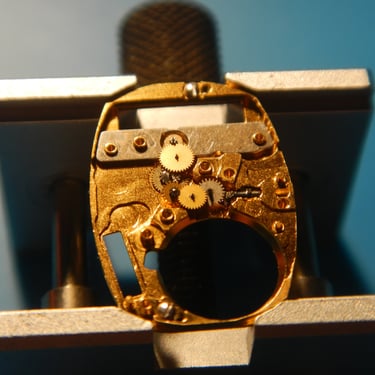
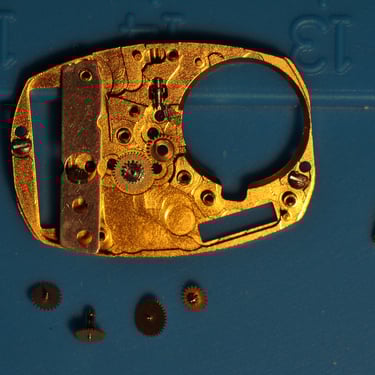

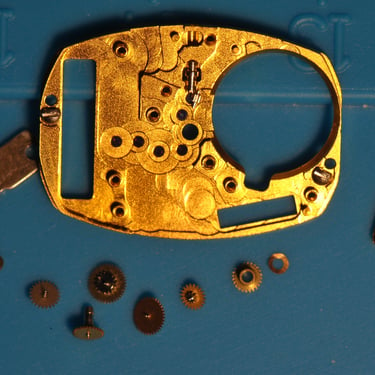
But at this stage of the disassembly I panicked and spent quite a bit of time trying to figure it out and eventually decided to move on. This tiny gear is really tricky to get back into its jewel. It still takes me about 20 minutes just for this one gear (did I already mentioned that I am not a watchmaker?), and I still wasn’t entirely sure which way it should go, since one pivot is longer than the other.
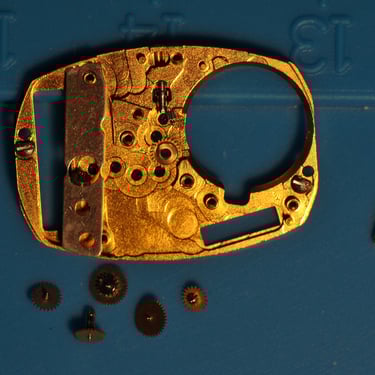
I decided to continue with cleaning the parts and figure out the assembly properly later.
To take the crown out, there is a little slot where you can put a 0.8 screw driver at the side of the movement, but at this point I had no idea, so I took the thing apart and was only able to get the crown out once both screws holding the keyless works were removed.
Cleaning
I clean my watches with a water-free watch cleaning solution and ultra-sonic, using multiple steps (except the rotor):
Pre-Pre-Clean for 3 minutes; Pre-Clean for 3 minutes;
Clean for 3 minutes; Rinse 1 for 30 seconds;
Rinse 2 for 90 seconds; Rinse 3 for 3 minutes;
Rinse 4 for 3 minutes
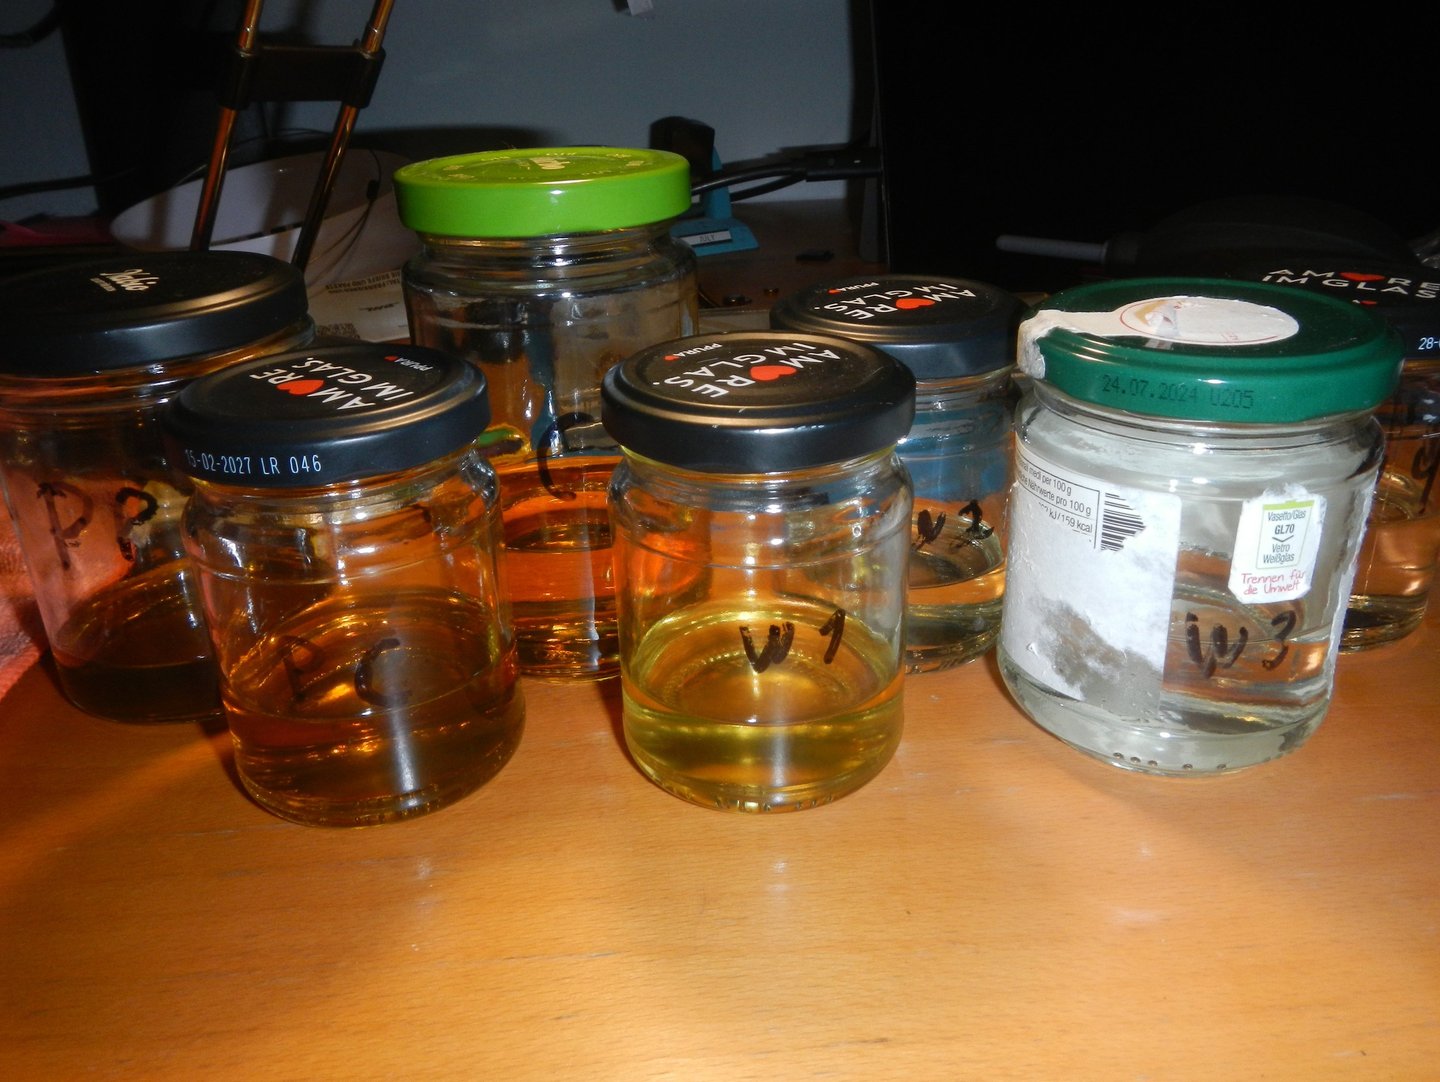
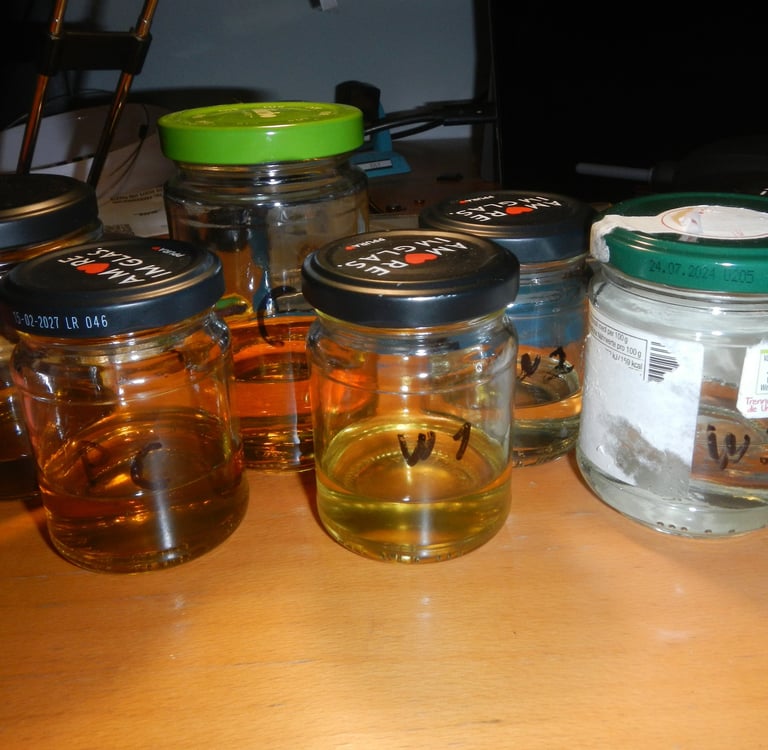
Yeah, it’s probably overkill, I know. But I figure I can extend the life of the cleaning solutions if I add extra cycles. This way, most of the dirt stays in the Pre-Pre-Clean, and the first couple of rinses are only slightly diluted with cleaning solution.Look at how yellow the Rinse 1 (W1) container already is, and how dark the PPC container looks. If I followed the instructions of the manufacturer to the letter, I’d have to throw out the cleaning solution after every single watch—and that just seems wasteful (or more profitable for the cleaning solution making business).
I then use these little containers I got from ebay here (no affiliate link), which let me sort the parts without having to use a sieve, or any other filter to separate them from the cleaning fluids later and really speeds up the process. Ask me how I know? For this little watch, although tiny, the movement is relatively simply, so two containers were enough to get the parts sorted in a way I was confident to be able to put it all back together later. One container would have been enough, actually....
Before using any cleaning fluid, please take proper precautions. The solutions I use are pretty toxic—not as bad as gasoline, which I used a lot back in my previous life, but still harmful enough to cause all sorts of nasty effects, from brain, liver, and kidney damage to cancer.
To protect myself, I wear a Moldox mask with an A2 filter filter whenever I open any container of cleaning solution or do the drying. I also leave at least one window open to ventilate the space. That way, I minimize exposure as much as possible. I strongly recommend doing the same.
So, I basically put the baskets, crown, and main plate into the first cleaning container and then pop the container into the ultrasonic machine. Important: leave the rotor out of the cleaning!
The rotor is magnetic, and putting it in the ultrasonic cleaner can cause a few problems. First, it can lose some of its magnetism. Second, it will attract all magnetic debris, making it look like a tiny porcupine. On top of that, some rotors have glued magnets that can loosen if exposed to solvents, which could ruin the rotor. Instead, I clean the rotor gently using fresh Rodico. Yes, it’s not a perfect clean for the pivots or for preparing the surface for oil, but I don’t risk it. Rodico lifts dirt safely without damaging the delicate rotor or its magnetic parts.
For drying… well, I have long, curly hair, and I’m firmly opposed to using hair dryers on my head in this context (curls, end up looking like... well ever seen a groomed poodle? yeah...). I grew up in Brazil, where power is expensive. If I had used a hair dryer back then, my mom would probably have made me pay the electricity bill in very creative ways.... Anyway, I do use a hair dryer to evaporate the last bits of cleaning solution from the watch parts. I leave them in the freshly cleaned ultrasonic basket and blow moderately hot air (around 40–50°C 60C is when it hurts, it if hurst its too hot I don't want to bend or warp the parts) over them for 3–5 minutes.
Once that’s done, I carefully open all the containers and put the parts into my parts tray—leaving the containers in there with the parts. Believe me, for this watch alone, I “missed” one part that had hidden itself inside the container. Had I not left the open-end container in the tray (I usually clean two watches in parallel), I would have spent ages hunting for that tiny part.
Following that comes inspection. Inspect every wheel, pivot, jewel, etc. This part I really often skip, unless I know the watch does not run. So I usually put the thing together and if It does not run I will then start inspecting stuff, because at this point chances are if you find something wrong with a watch like this, you will need a doner as its hard to find just that tiny little gear that has a teeth missing or that broken pivot etc... And when the damage is really obvious, you will see it, trust me.
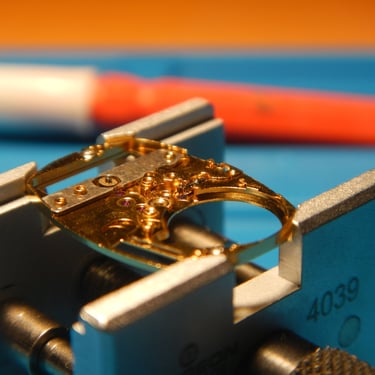
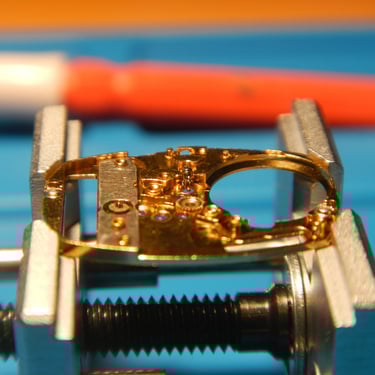
Assembly
Same thing here, the gallery below shows the parts in the order I put them back together. If I don’t highlight or comment on something, it simply means there’s nothing tricky going on—just basic watchmaking common sense (watch out for those springy parts that love to fly).
Whenever there’s something worth noting, I’ll pick a picture and point it out clearly(or make a comment in the picture)—so you know exactly what to look for.
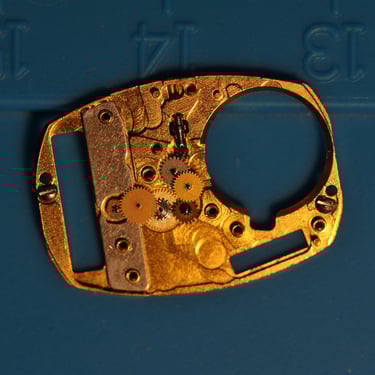
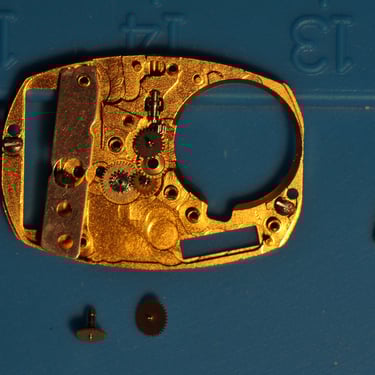
in this case beware of which way the tiniest little gear of all goes in, you can thank me later, or leave a donation.
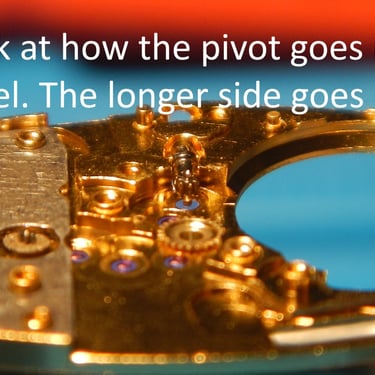
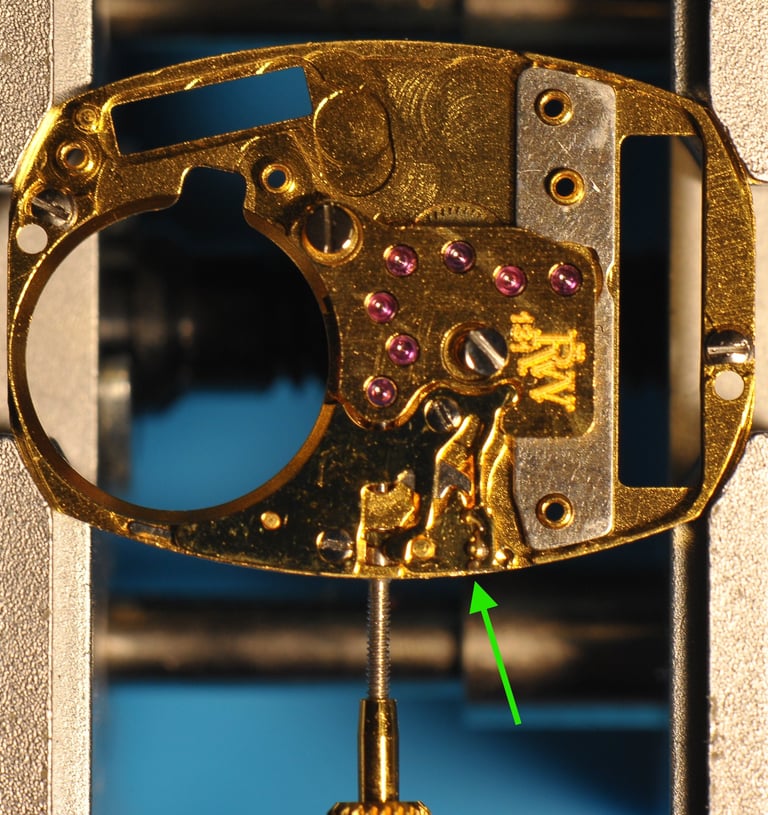
And here is another view of the tiniest gear of all, installed in the movement so you can see which way it goes.
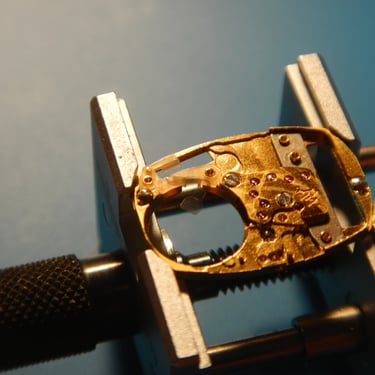
Here you can see the slot for a 0.8 mm screwdriver to lift part of the keyless works and pull the crown out of the caliber. This step is tricky, I had to use a second screwdriver by the crown to get enough clearance. Honestly, I’d almost recommend leaving the crown (with its sealing ring) in the movement when assembling the keyless works and never removing it later during assembly.
I then put the movement together but left the oiling of the pivots for later. That way, if I had to take anything apart again— and as a matter of fact I did had to take everything apart in this case because the tiniest gear was installed backwards—I wouldn’t have oil on the parts. No oil means no extra cleaning before reassembling, which saves time and headaches.
A quick note on oiling: if a pivot or jewel is oiled and the movement is then disassembled, that oil can spread to places it shouldn’t be. Reassembling a “contaminated” movement can leave oil on gear teeth, metal plates, or other parts, which can cause drag, attract dust, and dirt, and either make the movement stop running or shorten its service-life. If oil has already been applied and you need to take the movement apart, all pivots and jewels must be cleaned and rinsed. Rodico it’s not good for jewels—it doesn’t remove 100% of the oil and can leave a thin film, which will cause fresh oil to spread to the wrong places. The proper method is a full cleaning and rinsing with the appropriate watch cleaning solutions.
I usually assemble and test movements dry as much as possible to avoid this situation. Some movements, however—like ETA calibers—require extra caution. Certain components can block access to pivots later in the assembly, making proper lubrication impossible afterward. Personally, I’ve never had a problem with an ETA caliber; they’ve always run reliably, but maybe I am just lucky.
Watch out for this plastic part here, I think you cannot put it in the wrong way, but if you forget it, it will most likely short the battery over the dial to the main plate.
Troubleshooting...
Why you no wööööörk???!??!???
Seriously, why? After all this work?
This is the “fun” in watchmaking. It can be incredibly rewarding—but only because the potential for frustration is immense. By this point, I must have spent somewhere around 5–6 hours on this little watch. Oh, and did I mention that I’m not a watchmaker?
Anyway, I had to swallow the disappointment when I realized it still wasn’t working... But the basic troubleshooting routine goes like this:
Test battery (I always test the news batteries before putting them in the movement). Fine.
Test battery when installed in the movement. Still fine.
Test a connection point. I had battery voltage with a little drop on the output of the IC, so I concluded this was fine too.
Test for pulses on the coil. I had no pulses on the coil, strangely enough, which meant either bad IC or bad connection.
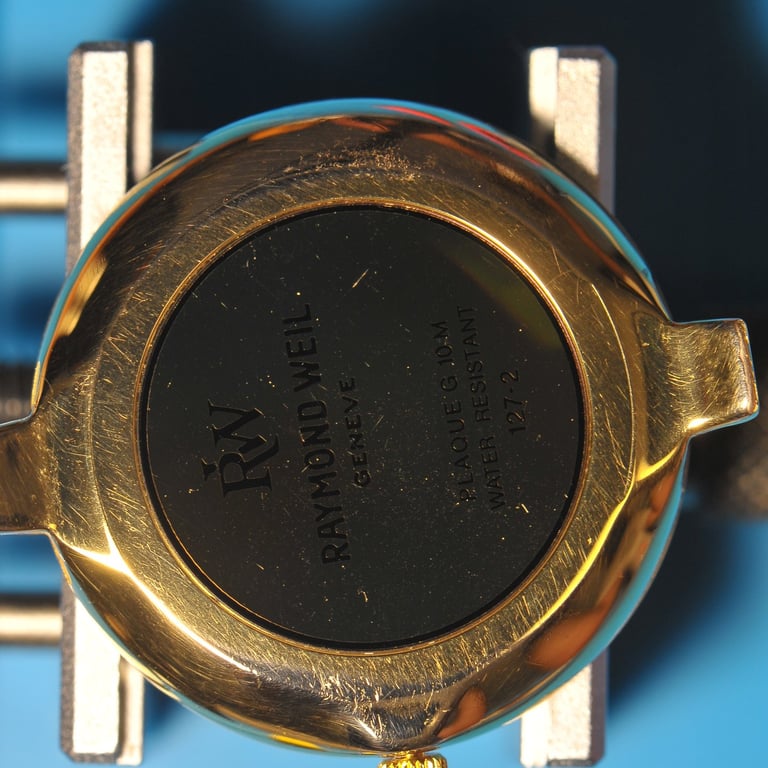
And for curiosity's sake, and for you people out there, the coil resistance on this one is 3.3K ohm
After all that frustration, I decided to call it a night and brainstorm ways to troubleshoot the IC or whatever else could be wrong. I even had the fleeting thought that maybe this watch was so unique it required a special connection to one of the IC pins after a battery swap, like a secret handshake to ensure only certified RW watchmakers could restart it. Of course, the internet was no help, and I hadn’t found any guidance on further troubleshooting.
The next day, I double-checked all connections and made sure the insulation plate was properly in place. Once everything was installed correctly, I decided to experiment a bit. I pressed on a spot of the IC while watching the rotor—and guess what? Sometimes the rotor would actually move!
This watch is tricky, because the motor only ticks every 10 seconds, meaning you have to keep an eye on it for a while to see any motion.
After that little breakthrough, I removed all the electronic components from the main plate and cleaned the contacts of the coil, electronic module, and battery connection with a glass fiber brush. Voilà—after putting everything back together, the watch was working!
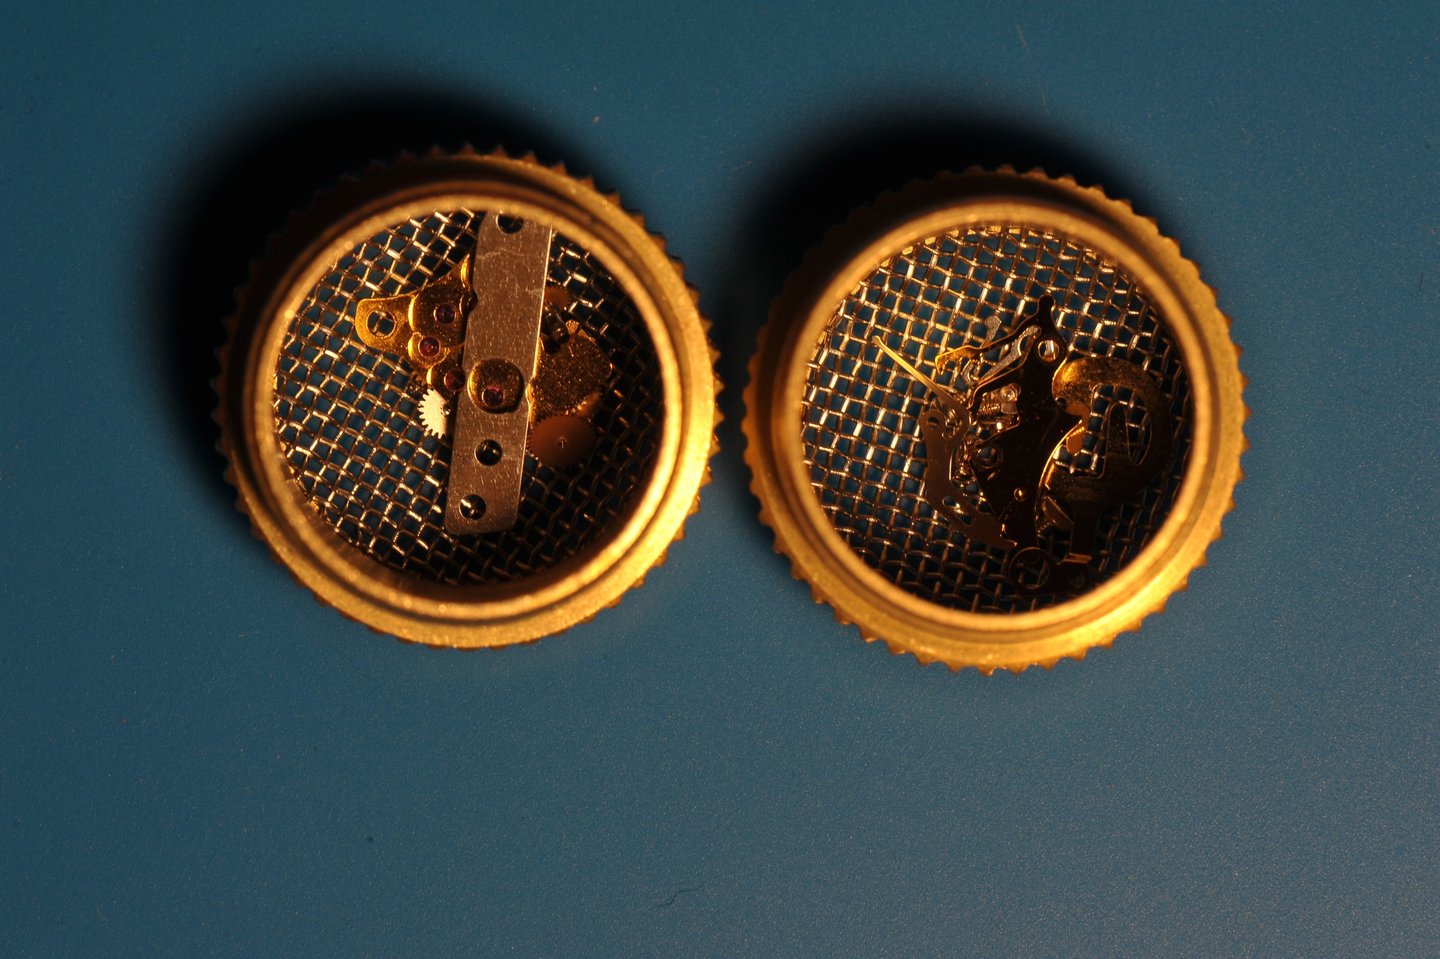
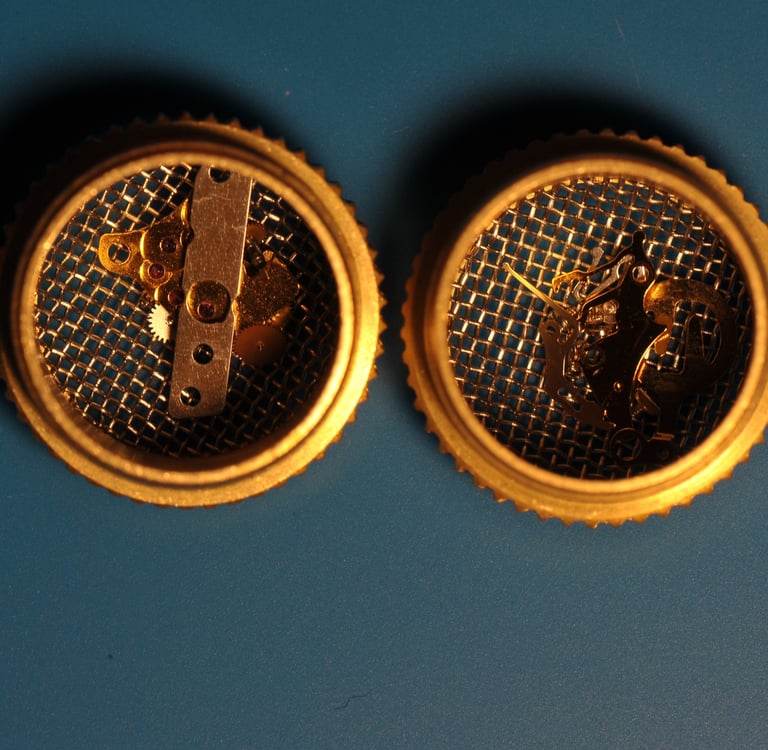
You can see in the pictures below, taken with a 30-second exposure, that the minute hand has moved three times, success! What a fantastic little movement!
The Straps and the Final Solution
At first, I set myself the impossible mission of giving a bit of life back into the old leather straps. I even called up the watch’s owner—someone who’s had a long, successful career in the textile industry—to ask how to clean leather properly. The advice? “Don’t use water. Use proper leather-cleaning products. Some people had good results using hand-cream.” She also told me that the original straps were a deep blue, matching the ring around the dial. By that point, I had pretty much lost hope of ever getting that color back, because well the straps now anything between black and dark grey. So, my goal shifted to something simpler: just clean the straps and put them back on the watch.
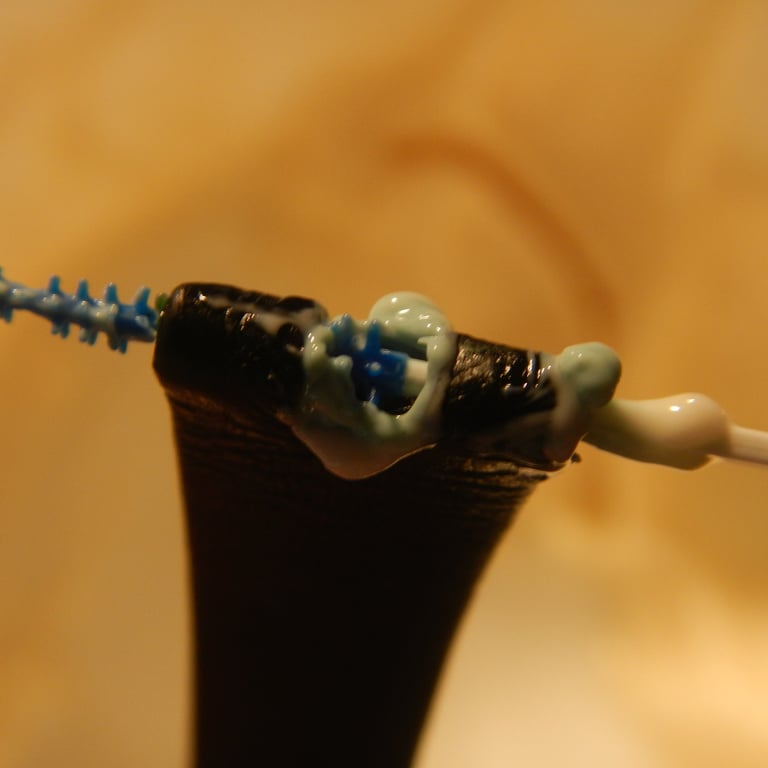
Armed with a tiny interdental brush, I scrubbed away at the green gunk lodged in the holes. I did manage to clear some of it, but honestly, the result wasn’t great. The straps still looked tired, and on an otherwise stunning watch, they really dragged the whole look down.
The final nail in the coffin came when I spotted a crack in one of the straps. That meant it could no longer do the one job a strap has—hold the watch securely to someone’s wrist. A damaged or worn strap, or bent or poor-quality spring bars, is just about the easiest way to lose, damage, or scratch a watch.

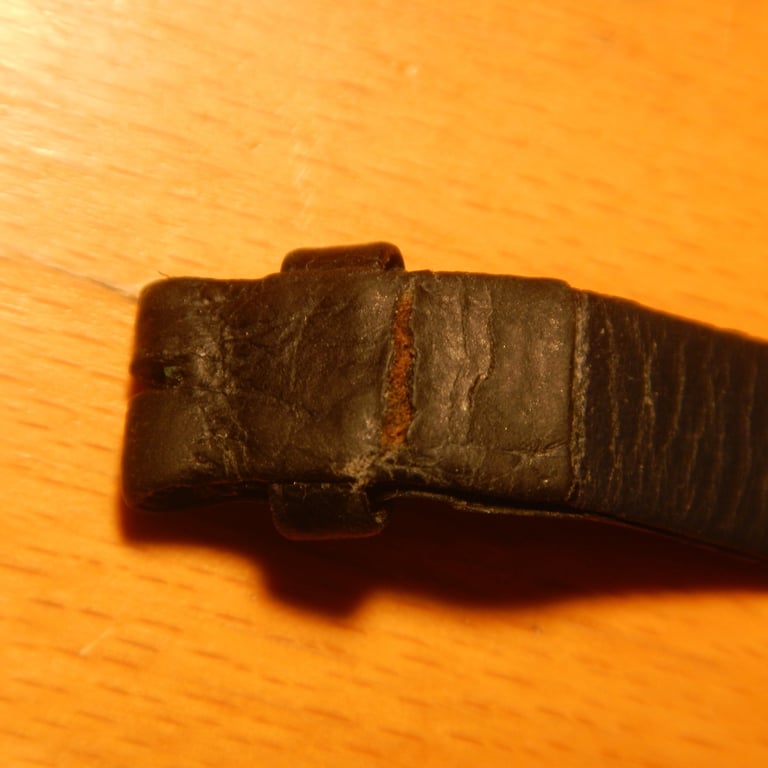
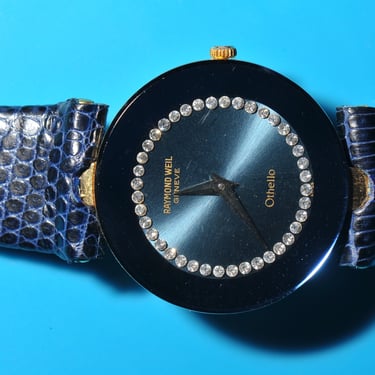
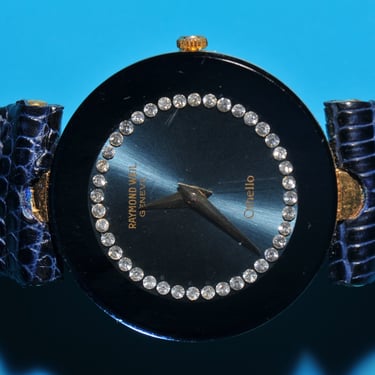
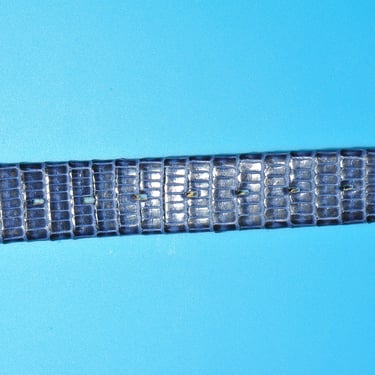
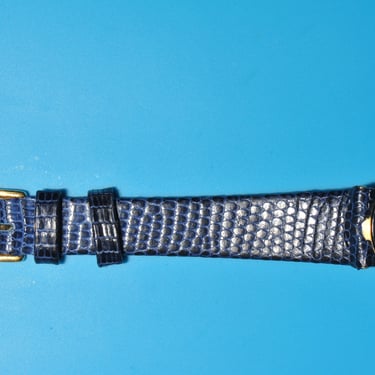
Obviously, the original strap was finished. It couldn’t be saved and certainly couldn’t be worn safely anymore. That left me with only one option: a new strap. But genuine Raymond Weil straps? Forget it. Nowhere to be found—and the few used ones cost about half the watch’s current value. So I went hunting deep into the eBay jungle and, after a good bit of scrolling, came out with the only realistic solution: a similar strap in deep blue. Luckily, I think the colour suits the watch perfectly.
Fitting the new straps was challenging. The pins simply refused to slide into the lugs. In the end I had to soften the leather with a dab of hand-cream, then feed a small-diameter Phillips screwdriver through the strap and case, push it out with a slightly larger screw driver, from the other side, and finally slide the spring bar in, using it to push the screwdriver out on the other side. A bit of a circus act, but it worked.
And with that, the project was done. This hardworking old watch had a fresh strap, a clean movement, and was ready for another round of life. A beautiful little jewel, scars and all.

Contact Me
If you are interested in nerding out about photography or want to see a bit more of my pictures, kindly leave a message in the form below. I'd also appreciate it if you let me know about any typos or errors you find on this website.
Subscribe
Or mail me at:
info@thiago-silva.com
If you are interested in ordering prints, calendars, or cards, or if you'd like to book me for product or event photography or photography workshops, kindly leave your contact along with your request. This way, we can discuss your needs in detail and ensure everything is tailored to your preferences. I'd also appreciate it if you let me know about any typos or errors you find.